Brute force is an attack (hacking) method that involves using an automated system to guess the password to your web server or services.
cPHulk provides protection against brute force attacks.
One of our clients tries to log into WHM and sees the following message:
Brute Force Protection This account is currently locked out because a brute force attempt was detected. Please wait 10 minutes and try again. Attempting to login again will only increase this delay. If you frequently experience this problem, we recommend having your username changed to something less generic.
It looks like a big problem, but in fact all you have to do is to log into the box via SSH and you’ll fix the problem in a couple of minutes.
Information Gathering
Since access to the box wasn’t urgent, here is what I recommend that everyone does in situations like this: gather information first. We want to know what caused the lock out first. In other words, who or what was brute forcing the box and caused this issue.
cPHulk stores all of its information in a database called cphulkd. There are two tables of interest: logins and brutes. The logins table stores login authentication failures. The brutes table stores excessive authentication failures indicative of a brute force attack.
Here is what you will find on the server:
[root@experts ~]$ ssh server

Last login: Wed Jan 14 11:02:14 2013 from host
[user@server ~]$ mysql -u root -p

Enter password:
Welcome to the MySQL monitor.  Commands end with ; or g.
Your MySQL connection id is id
Server version: version

Type 'help;' or 'h' for help. Type 'c' to clear the current input
statement.

mysql> connect cphulkd

Reading table information for completion of table and column names
You can turn off this feature to get a quicker startup with -A

Connection id:    id
Current database: cphulkd

mysql> select IP, BRUTETIME from brutes order by BRUTETIME;

Empty set (0.00 sec)


mysql> select IP, LOGINTIME FROM logins order by LOGINTIME;

+---------------------------------+---------------------+

| IP                              | LOGINTIME           |

+---------------------------------+---------------------+

| 220.199.6.48                    | 2013-01-14 11:23:10 |

| 220.199.6.48                    | 2013-01-14 11:23:10 |

| 220.199.6.48                    | 2013-01-14 11:23:10 |

| 118.212.186.59                  | 2013-01-14 11:23:40 |

| 118.212.186.59                  | 2013-01-14 11:23:40 |

| 118.212.186.59                  | 2013-01-14 11:23:40 |

| 221.7.58.37                     | 2013-01-14 11:24:07 |

| 221.7.58.37                     | 2013-01-14 11:24:07 |

| 221.7.58.37                     | 2013-01-14 11:24:07 |

| 123.147.144.45                  | 2013-01-14 11:25:16 |

| 123.147.144.45                  | 2013-01-14 11:25:16 |

| 123.147.144.45                  | 2013-01-14 11:25:16 |

| 119.62.128.42                   | 2013-01-14 11:25:41 |

| 119.62.128.42                   | 2013-01-14 11:25:41 |

| 119.62.128.42                   | 2013-01-14 11:25:41 |

| 114.143.242.51                  | 2013-01-14 11:27:23 |

| 114.143.242.51                  | 2013-01-14 11:27:23 |

| 114.143.242.51                  | 2013-01-14 11:27:23 |

| 222.179.116.53                  | 2013-01-14 11:27:47 |

| 222.179.116.53                  | 2013-01-14 11:27:47 |

| 222.179.116.53                  | 2013-01-14 11:27:47 |

+---------------------------------+---------------------+

21 rows in set (0.00 sec)
As you can see, a distributed brute force login attempt was launched starting at 11:23am. Fortunately, cPHulk quickly recognized the attack and had completely shut down login access for the user account.
Thus, when we tried to log in, it of course didn’t work.
Regaining Access
Since wz now knew the problem, and now felt good about how cPHulk protected our box, we have to open up the access again so we could go about our work. There are two different ways that we could have done this.
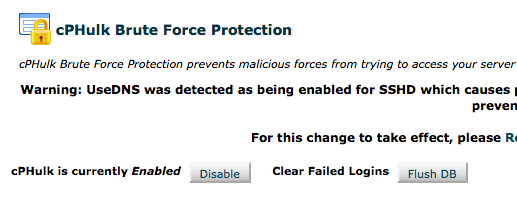
The first way would be to disable cPHulk to regain access, log into WHM, clear out the the block by using the “Flush DB” option in the cPHulk settings page, and then re-enable cPHulk. A number of people recommended this method, but I didn’t like it. We certainly don’t want to disable a security measure that successfully protected the box just to be able to regain access. What would happen if a huge wave of brute force authentication attempts hit the box in the time between disabling and re-enabling cPHulk? The answer is that the box wouldn’t protest and would tell the attacking program whether each attempt was successful or not.
If you need to use this method, the two commands you will want to use are:
/usr/local/cpanel/bin/cphulk_pam_ctl --disable

/usr/local/cpanel/bin/cphulk_pam_ctl --enable
These two commands will disable and enable cPHulk, respectively.
And here is the other method. This method didn’t require disabling cPHulk, and thus, didn’t require reducing protection to regain access. Essentially, We will just clear the tables manually, so that we could log in once again. Since this opens up the login process again, a brute force could still proceed but would be quickly shut down again.
While still connected to the database through the MySQL monitor, We will run a couple more queries.
Note: Before we run these queries. We store the details of these attacks in a file on the server in case we need to refer to the informations later. Never delete attack data without keeping a record of it somewhere. You never know when you may need it.
mysql> delete from brutes;

Query OK, 0 rows affected (0.00 sec)


mysql> delete from logins;

Query OK, 21 rows affected (0.00 sec)
Now, we can log back into the box.


